LILYGO T-Journal
ESP32 camera development board featuring an OV2640 2MP camera, 0.91-inch SSD1306 OLED display, servo motor support, and WiFi, suited for remote monitoring and robotics projects.
$15.61
Hardware Specifications
Connectivity
Components
240MHz Xtensa dual-core LX6, 4MB integrated flash, 520KB SRAM
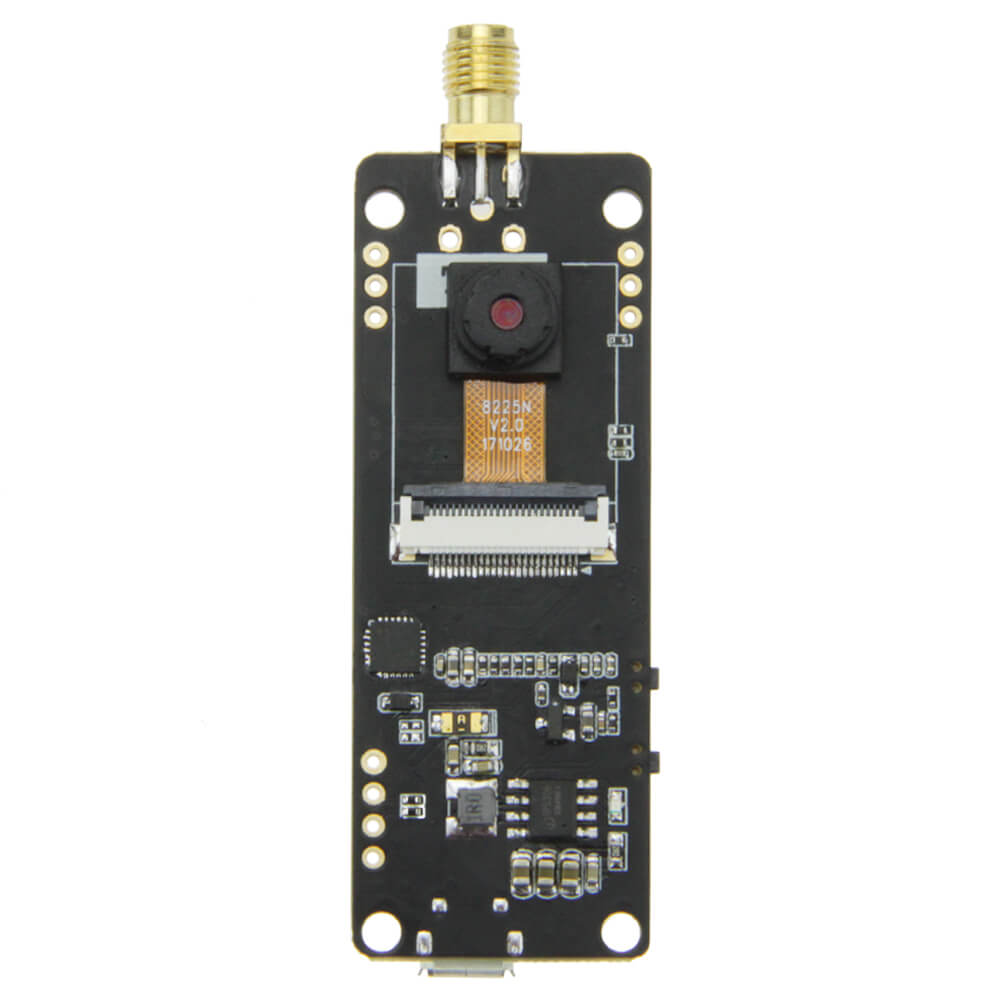
2 megapixel camera sensor (UXGA resolution)
0.91-inch OLED display controller, I2C interface
Resources
Where to Buy
Overview
The LILYGO T-Journal is a compact ESP32 camera development board built around the ESP32-PICO-D4 module. It combines a 2-megapixel OV2640 camera sensor with a small 0.91-inch SSD1306 OLED display on a single board, making it useful for building WiFi-streaming cameras, remote monitoring devices, and simple robotics platforms.
The board includes an analog servo steering engine interface, allowing direct connection of hobby servo motors for pan-and-tilt camera rigs. Operating voltage is 2.3V to 3.6V with a working current of approximately 160mA. A WiFi antenna is included in the package for improved wireless range. Battery operation is supported via a JST 2-pin 1.25mm connector with 1A charging current.
Firmware Compatibility
The T-Journal is compatible with Arduino IDE and ESP-IDF. The LilyGo-Camera-Series GitHub repository provides ESP32-CAM compatible example sketches including camera streaming via HTTP. Standard ESP32 camera libraries (esp32-camera) apply.
Flashing Guide
- Connect the T-Journal via USB Type-C cable.
- Install ESP32 Arduino core including camera support libraries.
- Select "ESP32 Dev Module" or "ESP32-PICO-D4" in Arduino IDE.
- Hold the IO32 button during power-up to enter download mode if needed.
- Flash the sketch; use the Reset button to restart after flashing.
Related Products
ESP32This product page may contain errors. If you find any, please report them.