LILYGO LoRa32 V1.0 Kit
ESP32-based LoRa development kit featuring an SX1276 transceiver and 0.96-inch OLED display, supporting 868/915 MHz long-range wireless communication for IoT sensor networks.
$46.36
Hardware Specifications
Connectivity
Components
Dual-core Xtensa LX6 processor with integrated Wi-Fi and Bluetooth
Long-range LoRa transceiver supporting 868/915 MHz with -148 dBm sensitivity
0.96-inch 128x64 OLED display controller via I2C
USB-to-UART bridge for programming and serial communication
Resources
Where to Buy
Overview
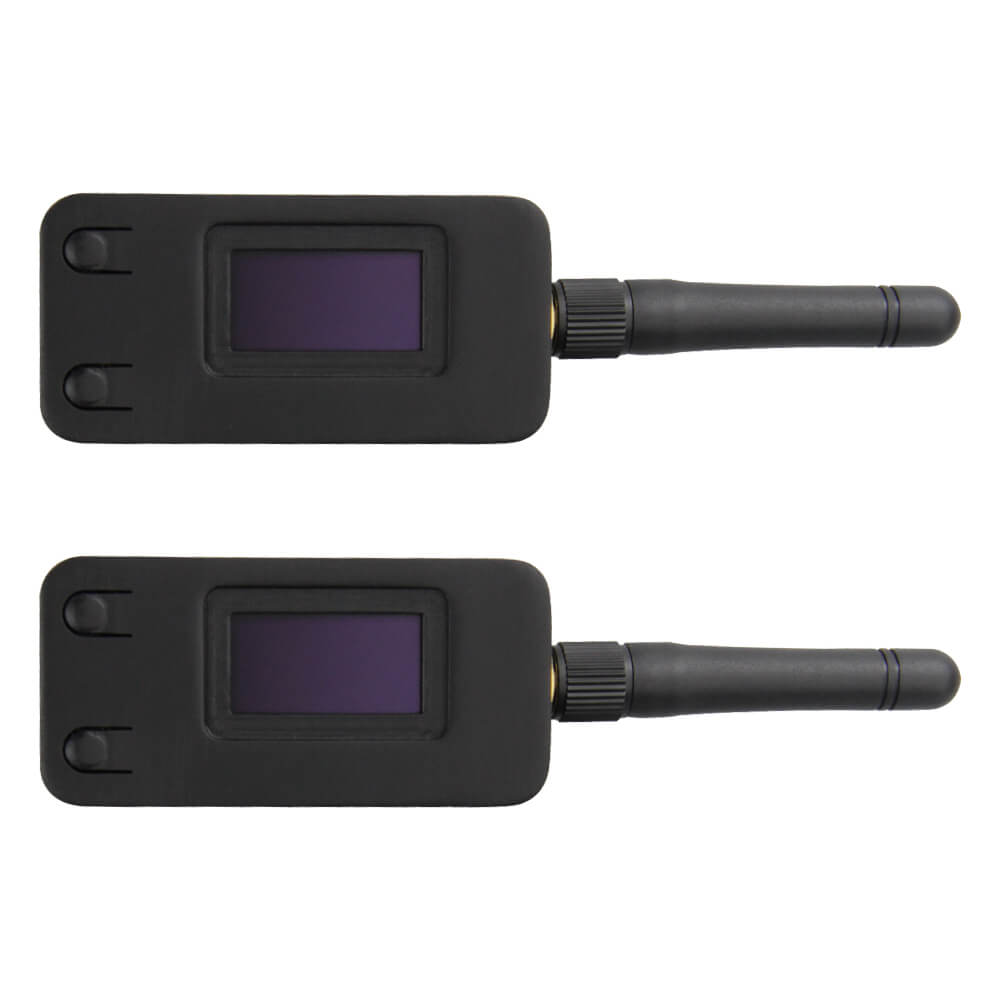
The LILYGO LoRa32 V1.0 Kit pairs an ESP32 microcontroller with the Semtech SX1276 LoRa transceiver to create a capable long-range wireless development platform. The onboard 0.96-inch SSD1306 OLED display (128x64 pixels) makes it easy to show sensor readings and network status without additional hardware.
The SX1276 supports both 868 MHz (EU) and 915 MHz (US) ISM bands and achieves sensitivity down to -148 dBm, enabling multi-kilometer communication ranges in open environments. With Wi-Fi and Bluetooth also available via the ESP32, the board is well-suited for LoRaWAN gateway prototypes, sensor nodes, and mesh network experiments.
A CH9102 USB-to-UART chip handles programming via the Micro USB connector. The kit includes two boards, enabling immediate point-to-point LoRa testing without additional hardware.
Firmware Compatibility
The LoRa32 V1.0 is supported by the Arduino IDE through the ESP32 Arduino core and the MCCI LoRaWAN LMIC library. ESP-IDF and MicroPython are also compatible. LILYGO maintains example code in the LilyGo-LoRa-Series GitHub repository covering LoRa point-to-point, LoRaWAN OTAA/ABP, and OLED display usage.
Flashing Guide
- Install CH9102 USB drivers for your operating system (available from LILYGO's GitHub).
- Connect the board via Micro USB.
- In Arduino IDE, select "TTGO LoRa32-OLED V1" as the board.
- Select the correct COM port.
- Open an example sketch and click Upload.
- Hold the BOOT button if the board does not enter flash mode automatically.
Related Products
ESP32This product page may contain errors. If you find any, please report them.