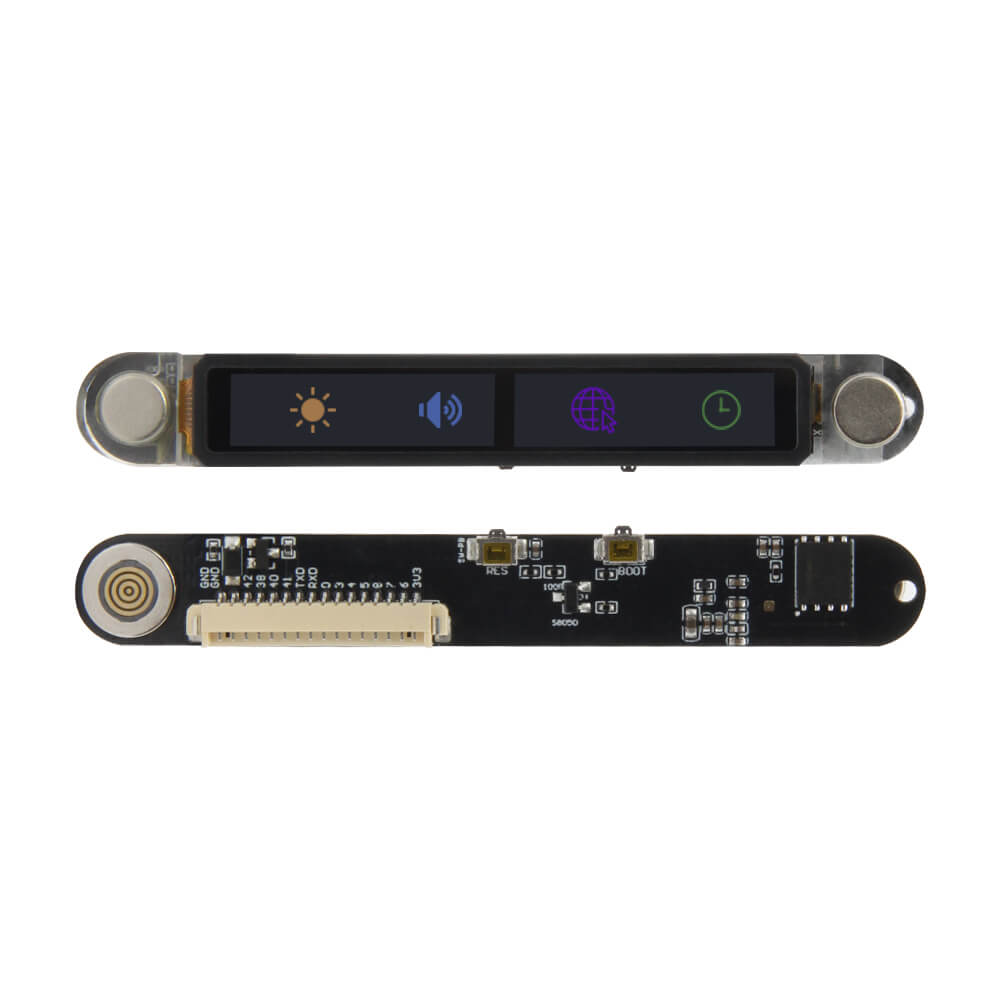
LILYGO T-Touch Bar
The T-Touch Bar is an ESP32-S3R8-based development board featuring a touchscreen display in a bar form factor, available in both LED and AMOLED display variants.
$25.50
Hardware Specifications
Connectivity
Components
Xtensa 32-bit LX7 dual-core MCU with 8MB PSRAM, WiFi and Bluetooth 5
Resources
Where to Buy
Overview
The LILYGO T-Touch Bar is a compact ESP32-S3R8-based development board presented in a sleek bar form factor with an integrated touchscreen display. It comes in two display variants: a standard LED version and a premium AMOLED version, catering to different application requirements and budget considerations.
Powered by the ESP32-S3R8 processor featuring a dual-core Xtensa LX7 architecture running at up to 240 MHz, the board ships with 16MB of flash storage and 8MB of PSRAM. Wireless capabilities include Wi-Fi and Bluetooth 5 with Bluetooth mesh support, making it suitable for connected smart home displays, industrial HMI panels, and portable IoT device interfaces.
The board includes a battery detection PIN (IO02) for battery-powered applications. Its bar form factor makes it particularly suitable for status displays, smart thermostats, or narrow panel-mounted interfaces.
Firmware Compatibility
The T-Touch Bar supports standard ESP32-S3 development toolchains:
- Arduino IDE: Full support via the Espressif Arduino core for ESP32-S3.
- VS Code with PlatformIO: Recommended for advanced development workflows.
- ESP-IDF: Espressif's official native development framework.
For the LED variant, use the repository at T-Touch_Bar. For the AMOLED variant, refer to T-Touchbar-AMOLED.
Flashing Guide
- Connect the T-Touch Bar to your computer via USB-C cable.
- If the device is not detected, hold BOOT, press and release RESET, then release BOOT to enter download mode.
- In Arduino IDE, select ESP32S3 Dev Module with appropriate Flash Size (16MB) and PSRAM settings.
- Select the correct serial port and click Upload.
- After flashing, press the RESET button to boot the new firmware.
Related Products
ESP32-S3This product page may contain errors. If you find any, please report them.