LILYGO T-Beam 1W
A high-power T-Beam variant with ESP32-S3, AXP2101 PMU, and a 1-watt LoRa transmitter available in 433/868/915/920/923 MHz frequency bands for extended-range applications.
$47.32
Hardware Specifications
Connectivity
Components
Dual-core LX7 microprocessor with 16MB Flash and 8MB PSRAM
Advanced power management unit with battery charging and monitoring
Where to Buy
Overview
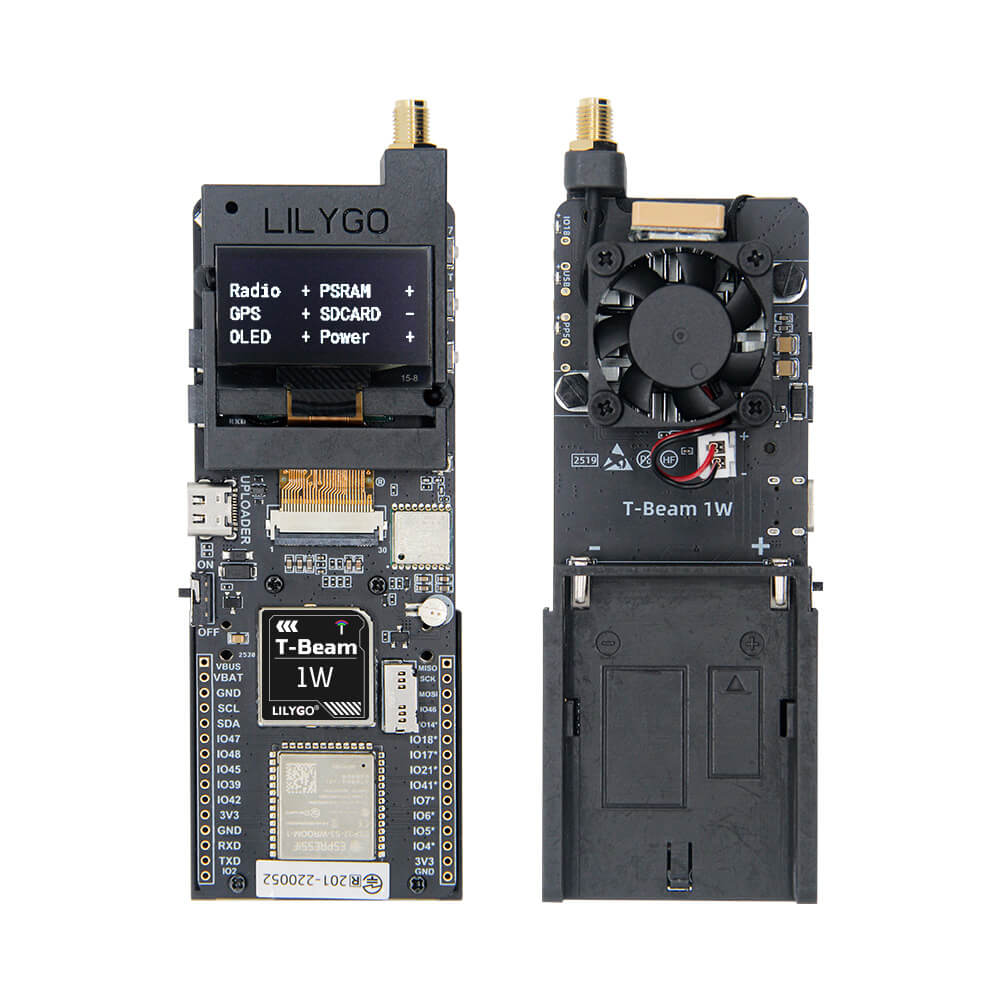
The LILYGO T-Beam 1W is a high-power variant of the popular T-Beam development platform, featuring a 1-watt (30 dBm) LoRa transmitter for significantly extended communication range compared to standard 100mW LoRa boards. This makes it particularly valuable for Meshtastic mesh network relays, long-range IoT sensor deployments, and remote telemetry applications.
The board uses the ESP32-S3FN8 dual-core LX7 microprocessor running at up to 240 MHz, equipped with 16MB of Flash and 8MB of PSRAM. Power management is handled by the AXP2101 PMU with an 18650 battery holder for portable, off-grid operation. Available frequency variants cover 433 MHz, 868 MHz, 915 MHz, 920 MHz, and 923 MHz to comply with regional ISM band regulations.
The increased TX power of 1W (versus the typical 100-200mW of standard LoRa boards) can dramatically extend range, especially in open environments. Users should be mindful of duty cycle regulations and ensure compliance with local radio laws when operating at 1W output power.
Firmware Compatibility
- Meshtastic — Compatible using the T-Beam firmware profile; the increased transmit power improves relay range.
- Arduino — Use the ESP32 Arduino core with RadioLib or LoRa library.
- ESP-IDF — Full Espressif SDK for custom production firmware.
- PlatformIO — Recommended for managing library dependencies.
Flashing Guide
- Install the ESP32 board package in Arduino IDE or PlatformIO.
- Connect via USB-C.
- Select ESP32S3 Dev Module as the target board.
- Configure Flash to 16MB and enable PSRAM (OPI).
- For Meshtastic: use the T-Beam firmware from meshtastic.org with the appropriate frequency variant.
- If the device does not enter download mode automatically, hold BOOT (IO00) while pressing Reset.
- Note: operating at 1W output may require adequate heat dissipation in enclosed enclosures.
Related Products
ESP32-S3This product page may contain errors. If you find any, please report them.