LILYGO T-QT Pro
Ultra-compact ESP32-S3 development board with a 0.85-inch IPS LCD display, dual-core 240 MHz processor, optional 2 MB PSRAM, and built-in battery charging for wearable and space-constrained IoT projects.
$9.05
Hardware Specifications
Connectivity
Components
Dual-core Xtensa LX7 at 240 MHz with 4 MB flash, 2 MB PSRAM, Wi-Fi 4, Bluetooth 5 LE (FN4R2 variant)
Dual-core Xtensa LX7 at 240 MHz with 8 MB flash, no PSRAM (FN8 variant)
0.85-inch IPS TFT display driver, 128x128 pixels, 262K colors
Resources
Where to Buy
Overview
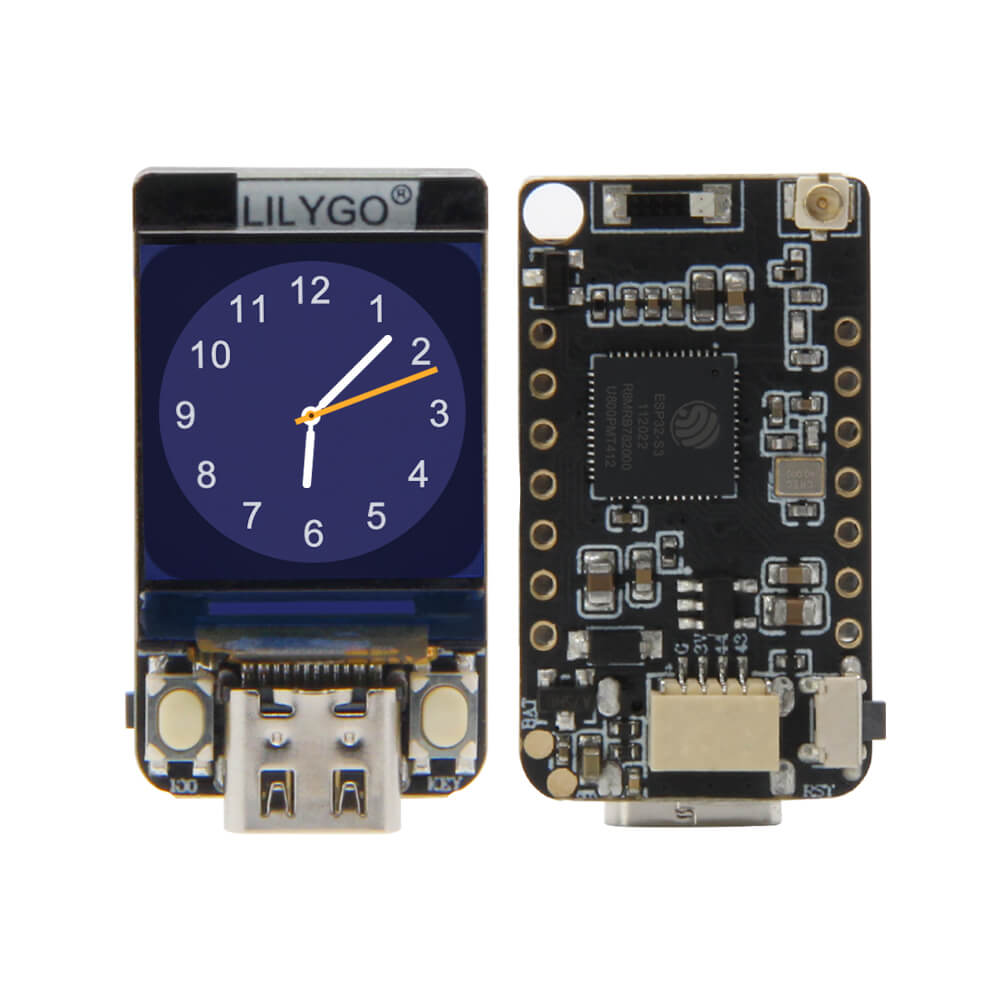
The LILYGO T-QT Pro is one of the smallest ESP32-S3 development boards with an integrated display. The 0.85-inch GC9107 IPS TFT at 128x128 pixels and 260 cd/m² brightness provides a crisp, colorful output despite the diminutive size of the board.
Available in two main MCU configurations — ESP32-S3FN4R2 (4 MB flash, 2 MB PSRAM) and ESP32-S3FN8 (8 MB flash) — the T-QT Pro suits a wide range of applications from data visualization pendants to compact sensor hubs. The ESP32-S3 delivers dual-core 240 MHz performance with native USB support via its built-in USB OTG controller, Bluetooth 5.0 LE, and Wi-Fi 4.
Onboard battery charging and detection circuitry make the board suitable for battery-powered wearables and portable devices. GPIO is available from IO00 to IO47, with IO04 reserved for battery voltage detection.
Firmware Compatibility
The T-QT Pro is supported by the Arduino IDE with the ESP32 Arduino core (v2.x or later for S3 support). The TFT_eSPI and LovyanGFX libraries work with the GC9107 display. ESP-IDF and MicroPython are also compatible. LILYGO's T-QT GitHub repository contains ready-to-use examples for display rendering, Wi-Fi, and battery monitoring.
Flashing Guide
- Connect via USB Type-C; the ESP32-S3 provides native USB CDC.
- In Arduino IDE, select "ESP32S3 Dev Module" and set PSRAM to "OPI PSRAM" for the FN4R2 variant.
- Install TFT_eSPI or LovyanGFX and configure for GC9107.
- Open an example from the T-QT GitHub repository.
- If the board is not recognized, hold BOOT and press RESET to enter download mode.
Related Products
ESP32-S3This product page may contain errors. If you find any, please report them.