LILYGO T-HMI
The T-HMI is an ESP32-S3-based development board featuring a resistive touchscreen display, designed for HMI (Human-Machine Interface) applications with WiFi and Bluetooth connectivity.
$17.99
Hardware Specifications
Connectivity
Components
Dual-core Xtensa LX7 MCU with 2.4 GHz WiFi and Bluetooth 5
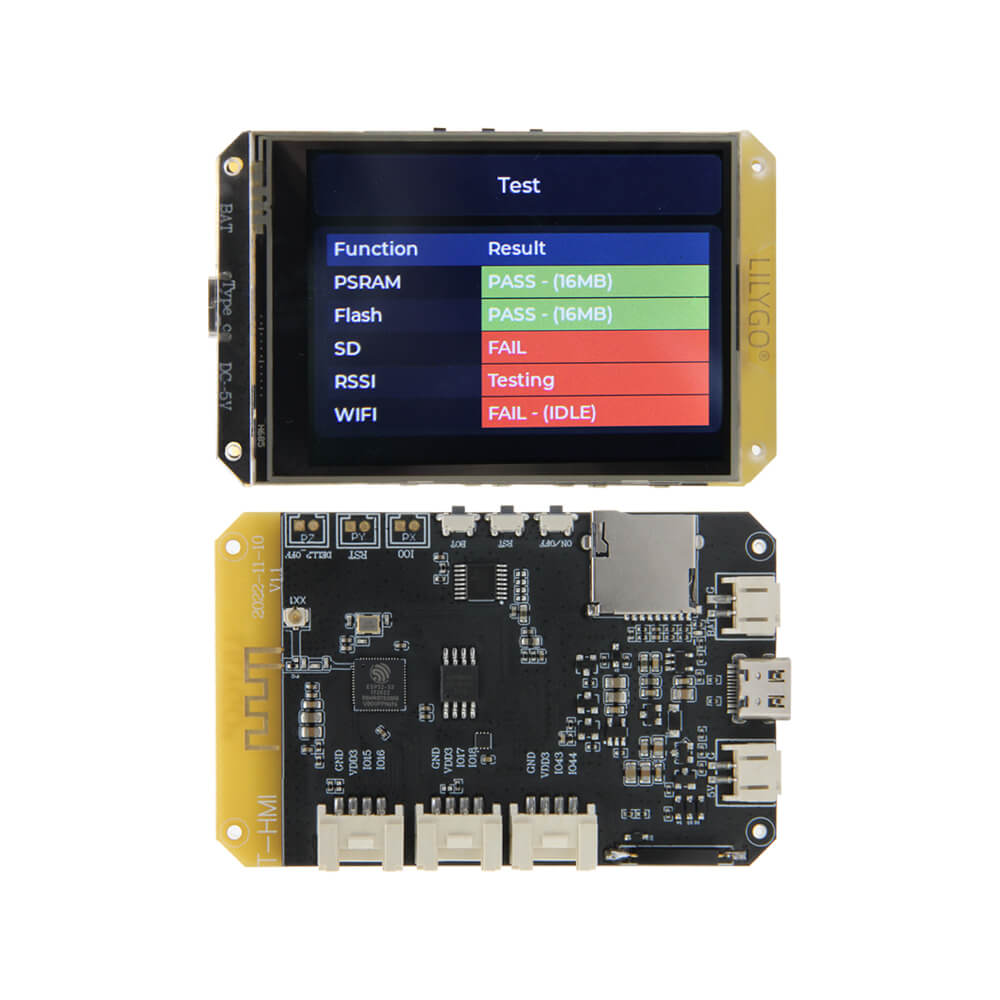
Bright and clear resistive touch display for HMI applications
Resources
Where to Buy
Overview
The LILYGO T-HMI is an ESP32-S3-based development board designed specifically for Human-Machine Interface (HMI) applications. It features a bright and clear resistive touchscreen display alongside the powerful dual-core ESP32-S3 processor, providing both processing muscle and a user-friendly interactive interface in a compact form factor.
The board integrates 2.4 GHz WiFi and Bluetooth 5 wireless capabilities, making it ideal for connected IoT dashboards, smart home control panels, and interactive display projects. The Groove connectors provide a standardized interface for connecting sensors and peripherals, though the GPIO count is limited to 6 pins via these proprietary connectors.
Power is supplied via USB-C (note: only USB A-to-C cables are supported; C-to-C cables do not work). The board supports lithium battery charging, enabling portable applications. Users should be aware that the device cannot be powered off using buttons while plugged in via USB.
Firmware Compatibility
The T-HMI supports the full ESP32-S3 ecosystem:
- Arduino IDE: Install the ESP32 board package and select ESP32-S3 as the target board.
- ESP-IDF: Full support for Espressif's official development framework.
- MicroPython: Supported via the ESP32-S3 MicroPython port.
- PlatformIO: Available via the Espressif32 platform in PlatformIO.
Sample code and libraries are available on the official GitHub repository.
Flashing Guide
- Connect the T-HMI to your computer using a USB A-to-C cable (C-to-C cables are not supported).
- If the port is not detected, manually enter upload mode: hold the BOOT button, press and release RESET, then release BOOT.
- In Arduino IDE, select ESP32S3 Dev Module as the board and choose the correct COM port.
- Set Flash Mode to QIO and Flash Size to match your board's flash.
- Click Upload and wait for the process to complete.
- Press the RESET button to restart the board and run your firmware.
Related Products
ESP32-S3This product page may contain errors. If you find any, please report them.