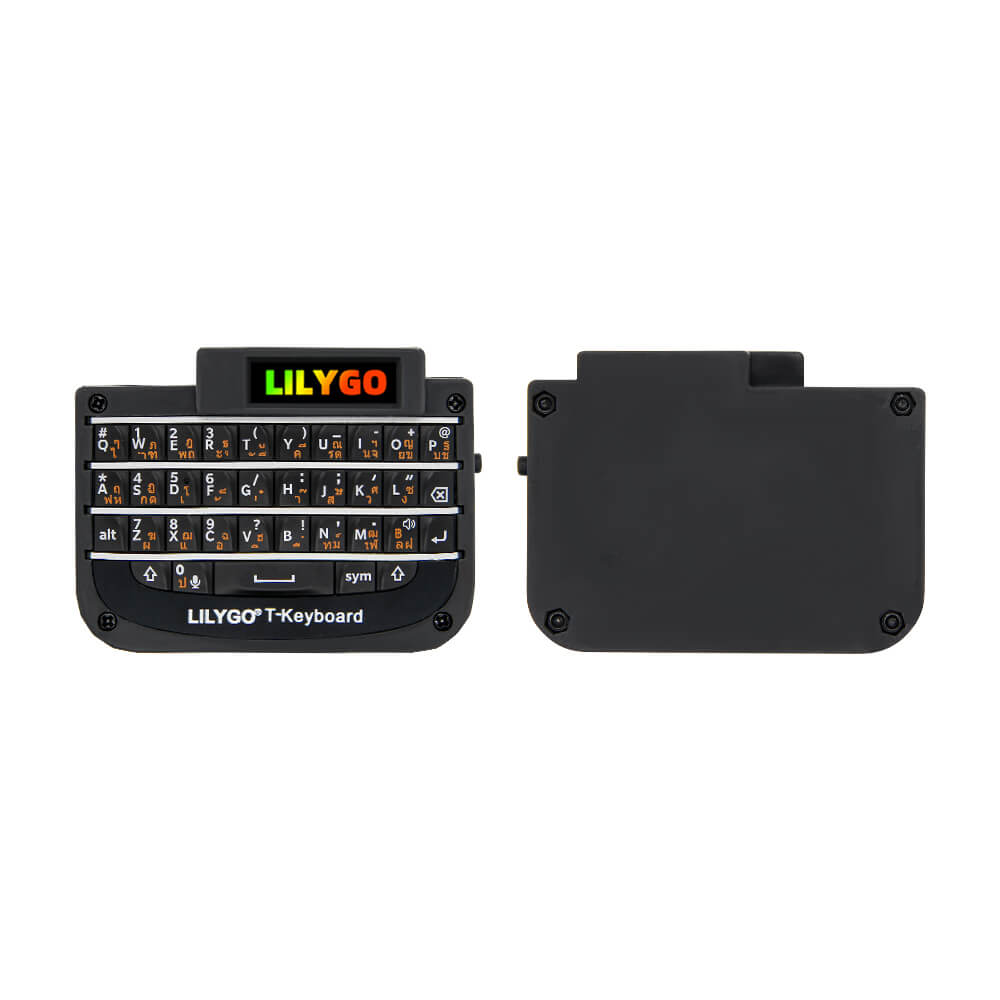
LILYGO T-Keyboard
ESP32-C3 compact QWERTY keyboard device with a 0.99-inch TFT display, 400 mAh battery, USB Type-C, Wi-Fi, and Bluetooth 4.2 for portable wireless keyboard and mini terminal applications.
$18.71
Hardware Specifications
Connectivity
Components
Single-core RISC-V 32-bit processor at 160 MHz with Wi-Fi and Bluetooth 4.2
0.99-inch TFT LCD driver, 40x160 resolution, 4-line SPI interface
Resources
Where to Buy
Overview
The LILYGO T-Keyboard is a standalone redesign of the T-Watch keyboard expansion, evolved into an independent product with its own wireless connectivity and display. The device features a compact QWERTY key layout, a 0.99-inch GC9D01 TFT display (40x160 pixels) for status and feedback, and a 400 mAh built-in lithium battery for portable use.
Built around the ESP32-C3 RISC-V microcontroller, the T-Keyboard supports Wi-Fi 4 and Bluetooth 4.2 LE, enabling BLE HID keyboard functionality for pairing with smartphones, tablets, and computers as a wireless Bluetooth keyboard. The USB Type-C connector serves for both charging and data transfer.
A 3D-printed shell gives the device a polished appearance and ergonomic feel. Operating temperature range is -20°C to 70°C, matching the GC9D01 display specifications. The device ships with a USB Type-C cable included.
Firmware Compatibility
The T-Keyboard is compatible with the Arduino IDE using the ESP32-C3 board package. BLE HID libraries enable Bluetooth keyboard functionality. The GC9D01 display is supported by TFT_eSPI with appropriate driver configuration. LILYGO's T-keyboard GitHub repository provides source firmware for keyboard scanning, display rendering, and Bluetooth pairing. ESP-IDF is also supported.
Flashing Guide
- Connect via USB Type-C to your computer.
- In Arduino IDE, select "ESP32C3 Dev Module."
- Set "USB CDC On Boot" to "Enabled."
- Install TFT_eSPI and configure for GC9D01 (same as GC9A01 with modified resolution).
- Open firmware from the T-keyboard GitHub repository.
- Click Upload; if not detected, hold BOOT and press RESET.
Related Products
ESP32-C3This product page may contain errors. If you find any, please report them.